October 23, 201720/10/2017 Comments 10 Major Updates in Ubuntu 17.10 Artful Aardvark So there you have it finally, Ubuntu 17.10. The release…
- October 23, 2017All kinds of software are currently available on Linux but every now and then, there is that Windows software or…
- October 3, 2017TimeShift is a system restore tool for Linux. It provides functionality that is quite similar to the System Restore feature in Windows…
 September 20, 2017Adobe provides a number of applications under Adobe Creative Suite, now under Adobe Creative Cloud. It’s not just limited to Photoshop…
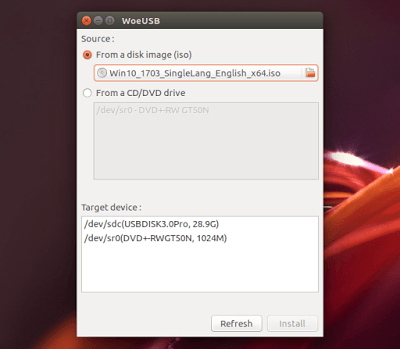
 August 8, 2017The WinUSB fork we covered a while back was renamed to WoeUSB recently, while also seeing quite a few releases for the past few…
 July 19, 2017Bluetooth is still very important in the world today given that a wide range of devices rely on its protocol…
- July 12, 2017Introduction This guide will show you how to download and install Ubuntu Linux on Windows 10 in such a way…
- July 10, 2017Objective Install Firejail and use it to sandbox applications, like web browsers, that interact with the open Internet. Distributions This…
- July 8, 2017Linux may have a reputation for security, but it isn't perfect. Many distributions also don’t have the best security defaults,…
- May 10, 2017Speeding up your Linux Mint is fun! That way, you'll get more performance out of your computer for free. Note: are…